European Starlings tend to get a undeserved bad reputation. People consider them messy and annoying, and in part it’s true: They tend to be aggressive in defending their territory, in large groups they leave a lot of droppings and a flock of starlings can pick a berry fruit tree dry in an instant.
Why, then, do we love starlings so? Starlings are adaptable, adorned with beautiful colors and incredible mimics. Anyone who has hand-raised a starling can attest to the unexpected voices coming from its cage many months after hatching. They are fiercely loyal creatures, demanding both their independence and their ownership of anything they consider “mine” (hint: Just about anything they can get their beak on). Finally, from an environmental standpoint, they’re effective pest exterminators; many of the government publications on starlings attest to this singular ability to far outweigh any negatives. Those who want to get rid of them should be asking the question, “Yes, but how would this affect the local ecology?” Regardless, I digress…
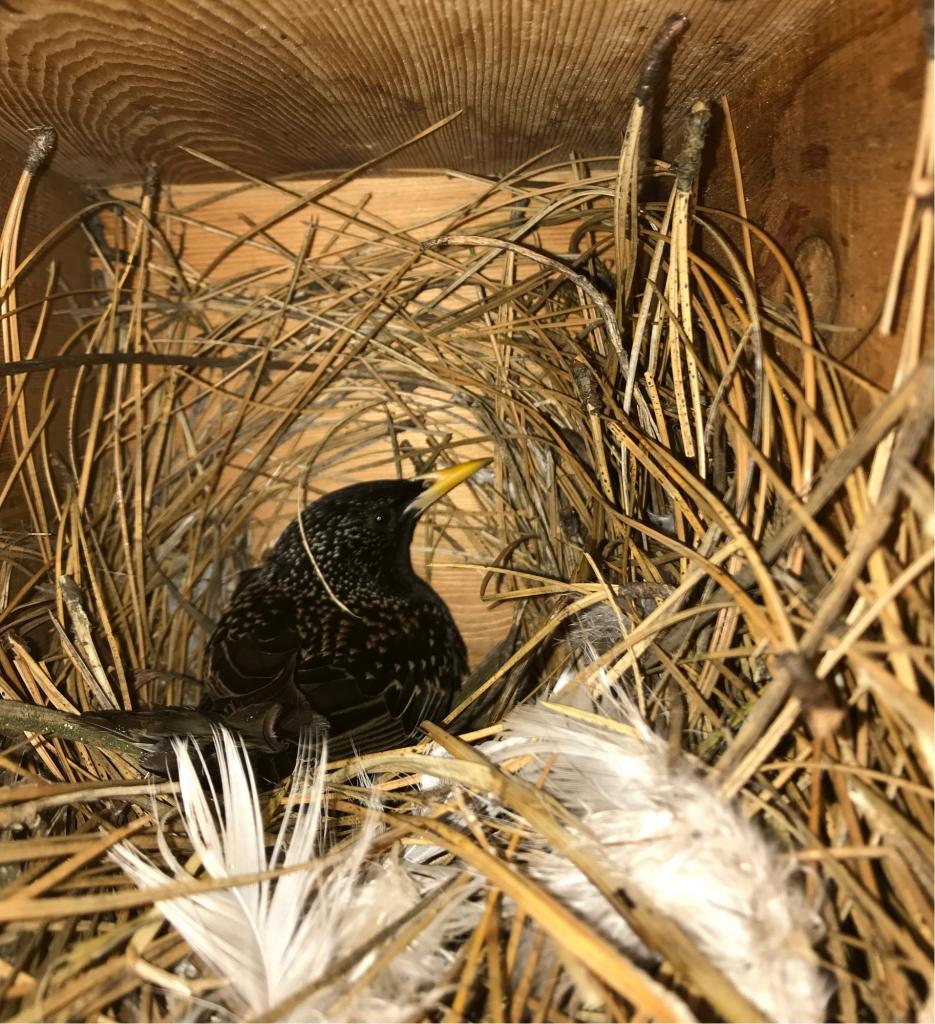
When our beloved pet starling passed away, we decided that it would be a nice memorial to have some starling visitors in the yard for the summer. We do this every year in January to allow for time for the neighborhood starlings to find, claim and use their newfound nest. In order to do this, we had to figure out the best way to make a nest that would be of interest to these little darlings. At the same time, we’re constantly saddened by the number of websites dedicated to the entrapment (and subsequent extermination) of European Starlings. We simply decided to take things half-way: Built the nest, minus the trap.
Where to put your Starling nest box
The best places for nest boxes are on large trees or beneath your home’s eaves. To minimize damage to trees, use galvanized or stainless steel nails or screws. Prior to installing a box on a property, especially if you rent it out, make sure you have permission.
To avoid becoming overly hot or wet, the box should be facing either north or east and at least three meters (10 feet) above the ground. It should ideally not be over a doorway, window, or heavily trafficked path, and it must be out of direct sunlight.
For safety reasons, the box should be oriented either north or east and at least three meters (10 feet) above the ground. It should ideally not be over a doorway, window, or heavily trafficked path, and it must be out of direct sunlight.
Materials & Tools Needed
- Cedar board measuring at least 7 feet x 7. 5 inches x 3/4 inches.
- Box of screws suitable for exterior use
- Drill
- Cutting tool (bench saw, etc)
- 2″ hole saw that fits the drill
- Pencil
- Measuring tape
- Straight edge (L-shaped ruler, etc)
You only need one board to construct your nest. Although we use cedar to increase its “weather-proofness,” starling nests are typically messy, so you may need to replace the nest every year. You will be unhappy if you paint your nest (in an attempt to improve weatherization) for two reasons. First, as mentioned below, the nest must be removed annually.
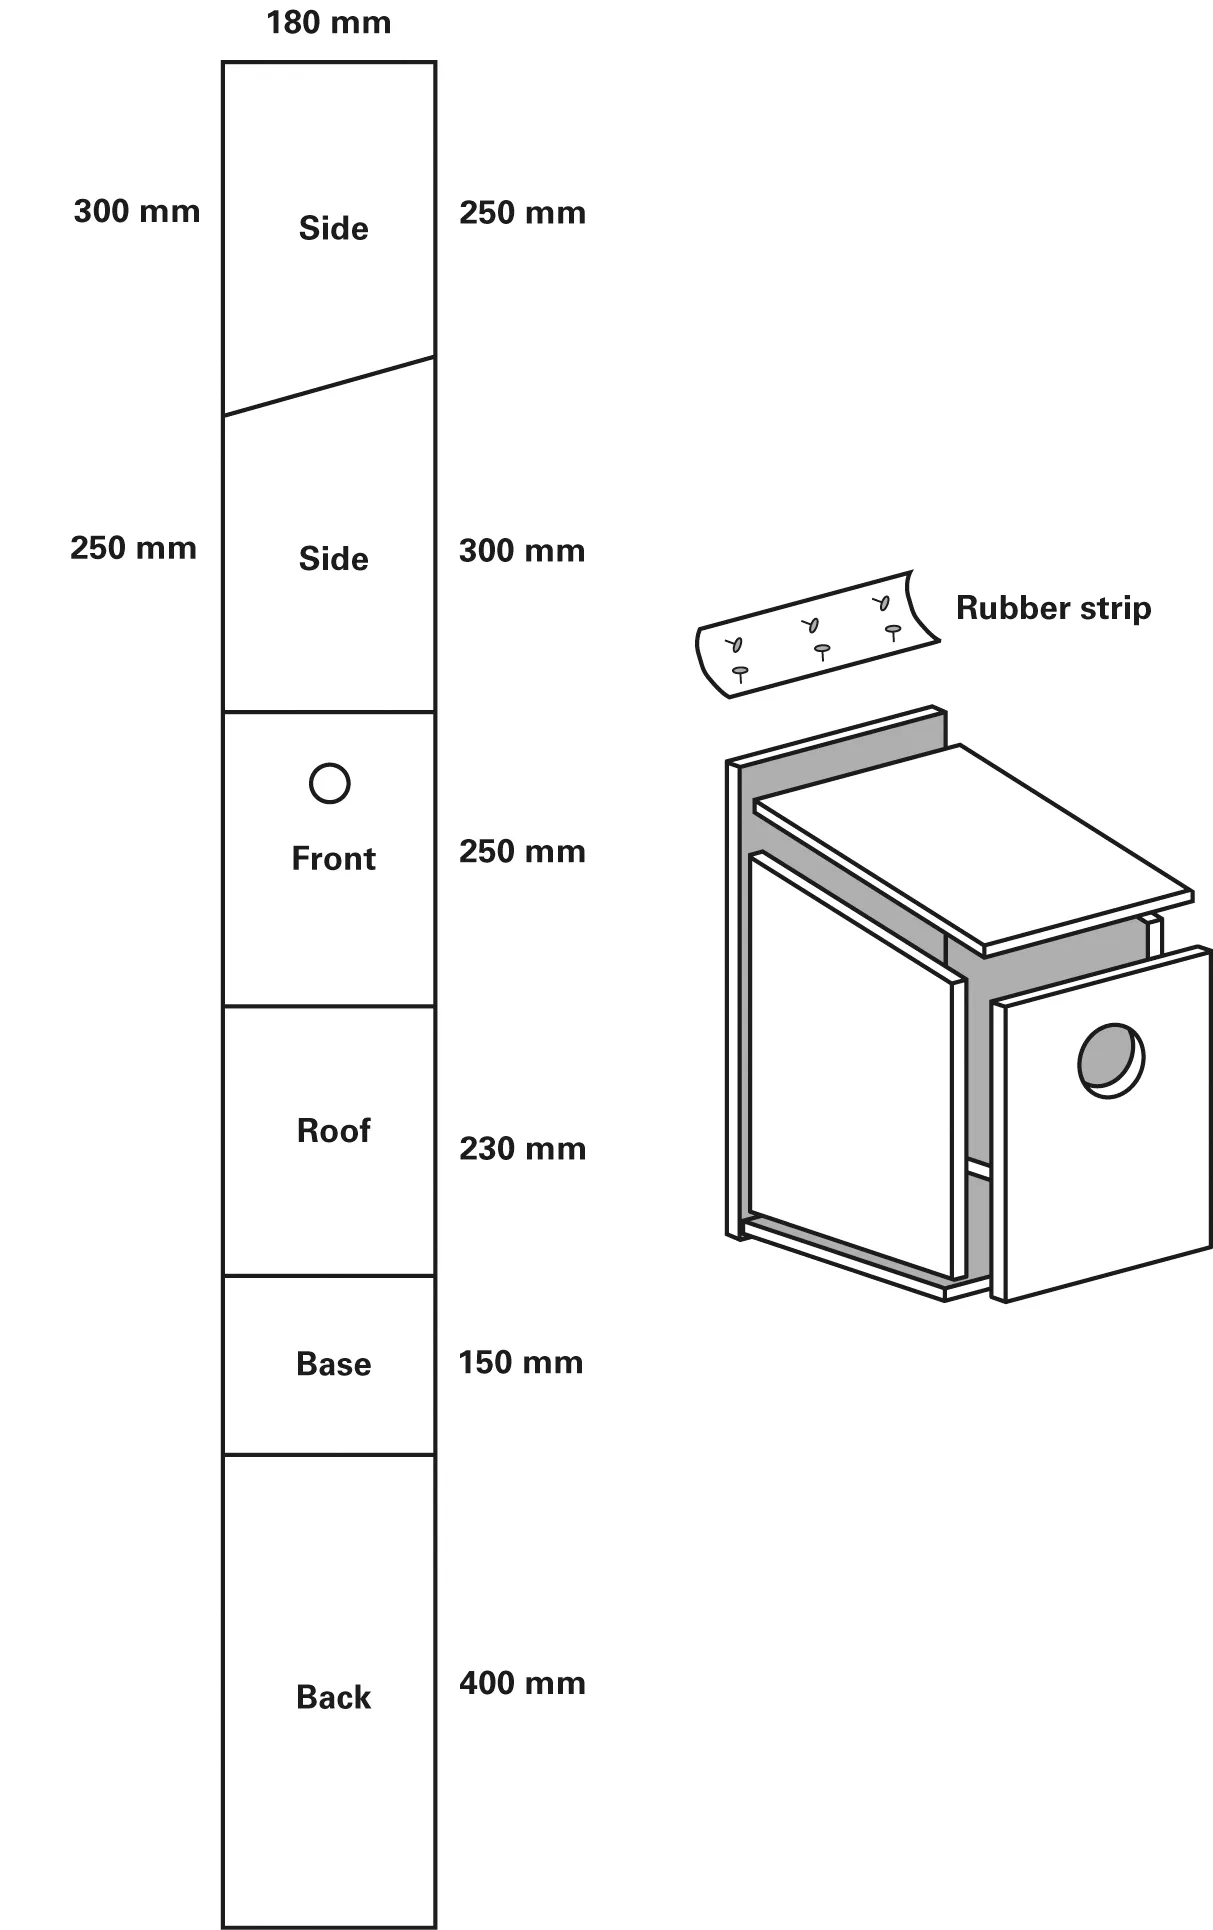
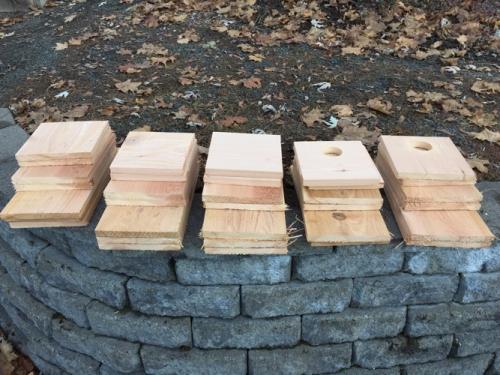
Second, any seal you apply to make it weatherproof will actually exacerbate the amount of rot and mildew that can develop internally (via bird droppings). If painting the nest is necessary, be sure to paint only the exterior and ensure that the entrance hole appears dark from the outside (this will help attract birds). Using the following height measurements, divide your board into equal parts, then cut with your preferred tool. Once done, you’ll have six sections with one left-over piece.
Making the bottom panel 14′′ long instead of 11′′ long is one change your starling guests will appreciate. 75; this will give them something sturdier to perch on than a round dowel or peg, and you’ll see the starlings sitting outside of their nest more frequently.
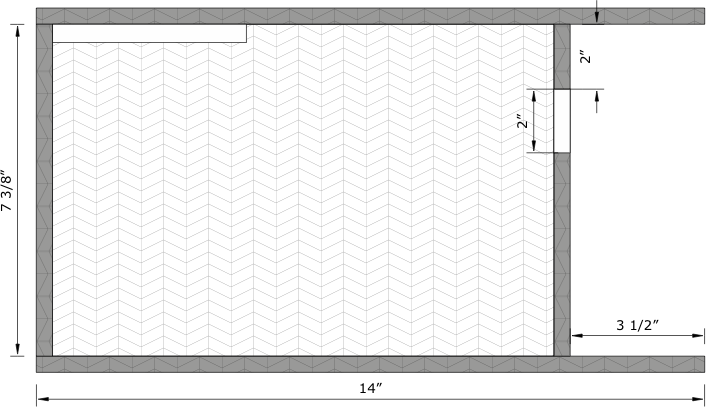
Measurement Note: Most boards don’t measure exactly 7. 5″ wide. I haven’t the foggiest idea why. It’s likely that your board will measure around 7. As a result, this will have an impact on your measurements for the height at which to cut the front and rear sides; otherwise, there will be a space above both sides. Though it’s progressive, I venture that the majority of starlings would rather stay in weatherized lodgings than in an ostentatious side skylight. Thus, the following table—which is more accurate than the image—should be used for your measurements:
| Section | Length | Width |
| Bottom & Top Panels | 14″ | 7-3/8″ |
| Side Panels | 10.5″ | 7-3/8″ |
| Front & Back Panels | 7-3/8″ | 7-3/8″ |
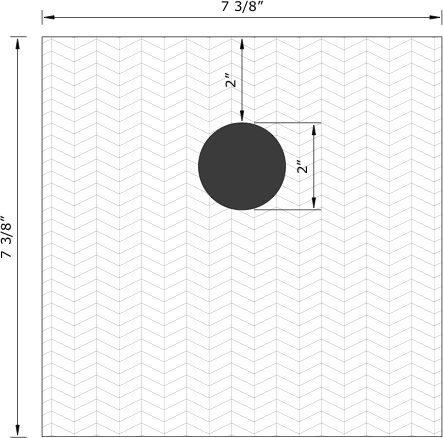
The dimensions given above, which are 7 3/8′′, are the variable ones; if the width of your board is unusually different, say 7 75″, make sure to adjust those numbers to match. Otherwise, you’ll have that odd gap mentioned above. Drill a 2-inch hole in the front panel of the board once the sections have been cut out.
The hole’s center should be two inches from the top. Anything smaller won’t allow starlings to enter the nest, so don’t use it. On the right side of the front panel, drill three holes and prepare three screws. To drill it as well, you must ensure that the right side panel is positioned underneath.
When you’re finished, the nest will have one “L-shaped” side. There won’t be any more holes drilled into this part because it is meant to be removable. Proceed to create the opposite “L” shape by doing the same to the left and back panels. Since the left and back panel pairs cannot be removed, attach them to the bottom board by pre-drilling the holes to prevent the wood from splitting. You should now have two functional parts of the nest.
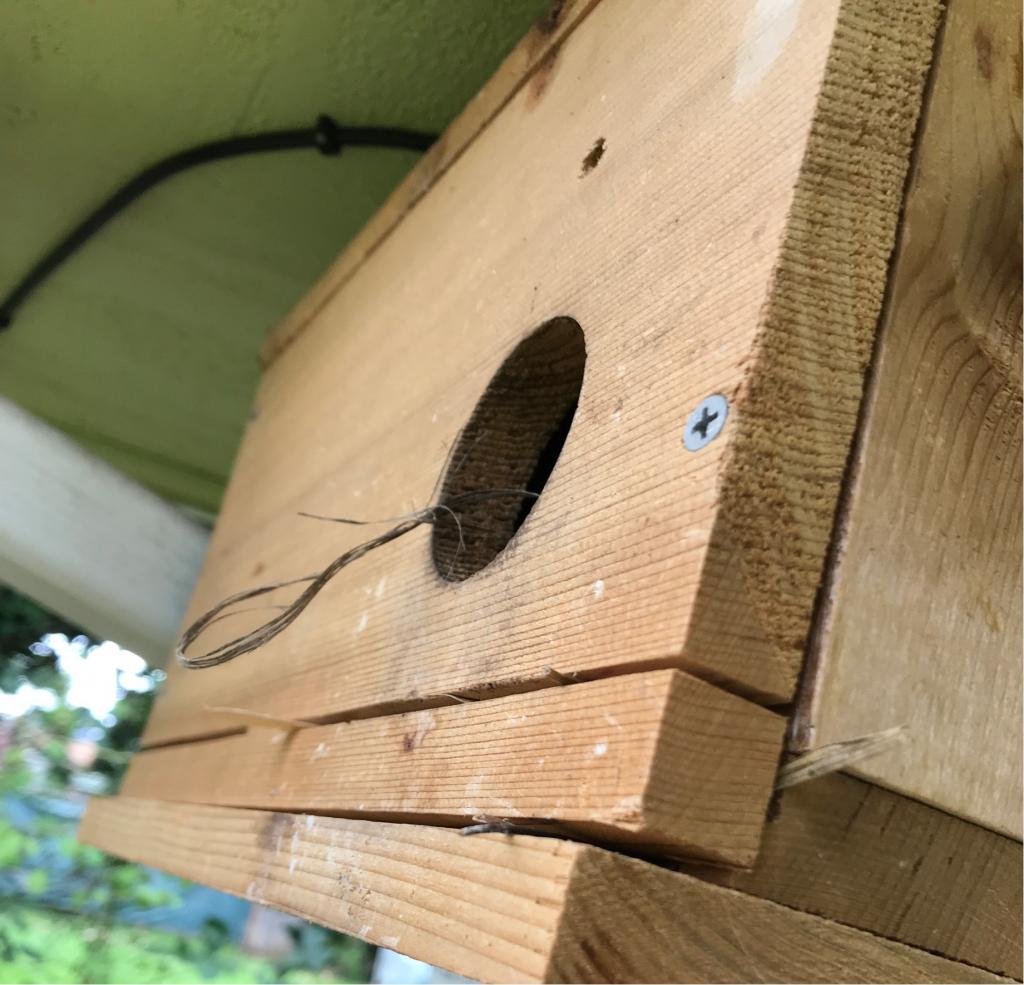
Make sure the additional length of the top panel extends past the front of the nest when you add and secure it. As you attach the roof, use the front/right panel to help stabilize it; however, be careful not to secure this section as well. After finishing, you ought to have two of the nest’s components that are completely operational. The pressure from the top/bottom of the nest will keep the front/right panel in place. It will actually fit nice and snug.
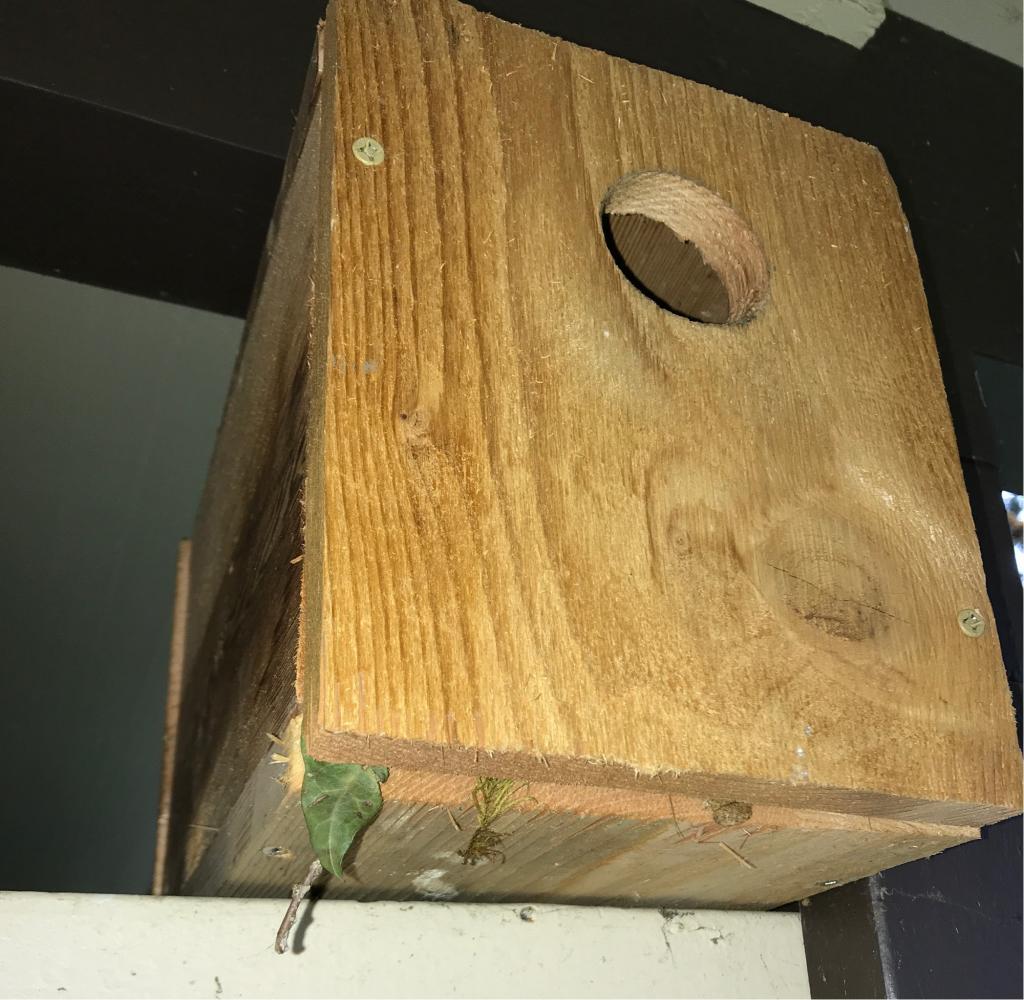
Prep the nest for attaching to its final resting location. Starlings appear to enjoy the interior corners of buildings based on what we have observed. In our instance, we’ll have to use the top and the back to secure the nest. Though this will do for now, we could have made the left side detachable if we had given it more thought.
We deliberately blocked our access to the detachable portion of the nest to avoid prying eyes in case temptation overcomes us. Furthermore, since starlings have a tendency to pack their nest with anything they can get their beaks on, having a removable side panel can be temperamental and easily removed, which could permanently frighten the mother bird and force her to abandon her eggs (we’ve seen it happen). It’s probably a good idea to secure it in place with a screw from the bottom.
FAQ
What kind of bird houses do starlings like?
Will starlings use a nest box?
What size hole for starling?
How high is a starling nest?